
Monday, June 22, 2020
Tables are a powerful HTML tool that can be used in many ways. In most applications, a table is commonly used to present tabular information such as schedules, statistics, calendars, etc. In the world of HTML, a table is also used for these purposes, but it is more commonly used for organizing the content of complex web pages. Many web designers prefer to create an overall web site layout through the use of a single table. A table lets web designers make use of rows and columns so they can specify precisely where text, images, and objects are to be placed within their documents.
Understand
How Tables Work and When to Use Them
Quite
simply, a table is a section of information, broken up into columns and/or rows
of blocks, called cells.
- A cell is the basic unit of a table. It is formed by the intersection of a row and a column.
- A row is a line of cells running from left to right.
- A column is a stack of cells running up and down.
- The border is the rectangle
that defines each cell and the outside of the table.

Create
the Table’s Structure
To create a
table, you use the following tags:
- The table tag is a container for every other tag used to create a table in HTML. The opening <table> and closing </table> tags should be placed at the beginning and the end of your table.
- The <tr> (table row) tag marks the start of each row, and the </tr> tag marks the end of each row. The number of pairs of <tr> and </tr> tags you use controls the number of rows in the table.
- The <th> tag stands for table header. An optional tag used instead of the td tag, this tag defines a cell containing header information. By default, the content in header cells is\ bolded and centered.
- The <td> (table data) tag marks the start of each cell within a row, and then the </td> tag marks the end of each cell. The number of pairs of <td> and </td> tags controls the number of cells in the row, and thus controls the number of columns.
<table>
<tr><td> Cell 1</td> <td> Cell 2 </td> </tr>
<tr><td> Cell 1 </td> <td> Cell 2 </td><td> Cell 3 </td></tr>
<tr><td> Cell 1 </td></tr>
</table>

Opening and
closing table tags surround the entire section of code. This tells the browser
that everything inside these tags belongs in the table. And there are opening
and closing tr tags for each row in
the table. These surround td or th
tags, which, in turn, contain the actual content to be displayed by the
browser.
Format Tables within Web Pages
You may have noticed by now that all the text in a table appears aligned to the left side of each cell. This, and may other features of a table, can be easily customized with a few table attributes or a style sheet.
Borders
Tables, by
nature of their design, have internal and external borders. By default, most
recent browsers set the border size to zero, making them invisible. However,
borders can be quite useful for tables of statistical information, for example,
where it’s necessary to see the columns to understand the data better.
To set the border width for the outside border of a table, add the border attribute to the opening <table> tag, and specify the number of pixels for the width of the border. Specifying a border width without a border color makes the browser display the border in its default color, which is usually gray. The best way to set border color is to use CSS. For example, to create a border five pixels wide around the table:
<table border="5" style="border-color:blue">
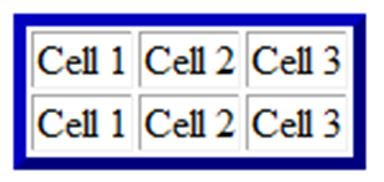
Table Heading
Table heading is the title given to the table row or column or both. The <th> tag is used to create table column heading or row heading.
Example:
<table border="1">
<tr>
<th>Subject</th>
<th>Total marks</th>
</tr>
<tr>
<td>Math</td>
<td>100</td>
</tr>
<tr>
<td>Science</td>
<td>100</td>
</tr>
</table>

Adding a Caption in a HTML Table
To add a caption to a table, we must use the “caption” tag.
<html lang="en">
<head>
<style>
table,th,td {
border: 1px solid black;
border-collapse: collapse;
}
th,td {
padding: 10px;
}
th {
text-align: left;
}
</style>
</head>
<body>
<table style="width: 100%;">
<caption>
Student's Details
</caption>
<tr>
<th>Firstname</th>
<th>Lastname</th>
<th>Age</th>
</tr>
<tr>
<td>Priya</td>
<td>Sharma</td>
<td>24</td>
</tr>
<tr>
<td>Arun</td>
<td>Singh</td>
<td>32</td>
</tr>
<tr>
<td>Sam</td>
<td>Watson</td>
<td>41</td>
</tr>
</table>
</body>
</html>

Note: To change the position of the caption use caption css property:
caption {
caption-side:bottom;
}
Cell Padding and Spacing
When the
borders are visible for a table, it’s easier to see how much space is around
the content and in between the cells. Two attributes can be added to the table
tag, so you can control those types of spaces.
- cellpadding
Space between the
content within the cell and the edges of that cell
- cellspacing
Space in between each
of the individual cells
First, CellPadding affects the amount of space between the content and the edge of the cell. When the borders are visible, increasing the cell padding can give extra buffer space around the text, so it doesn’t run into the borders.
<table border="5" cellpadding="15" cellspacing="15">
Second, CellSpacing affects the amount of space between each of the cells in the table. While not located inside the actual cells, this space can be increased to allow for a gutter between multiple cells.

Set
Table and Cell Width
Planning
out the size of your tables ahead of time, this is particularly important if
the table you are creating needs to fit within a predetermined amount of space
on your page. You can use the height and width attributes independently of each
other. If you don’t specify them in your HTML, the browser chooses the size
based on the amount of content within each cell and the amount of available
space in the window.
However,
you can choose to control the exact size of the entire table by using width
and/or height styles in the <table>
tag. You can also control the size of each cell by putting width and height
styles in the individual <td>
tags. The width and height styles can be specified as either pixels or
percentages.
<table border="3" height="200" width="200">
In this case, I would specify an absolute size for my table, one that shouldn’t change if the browser window were larger or smaller.
<table border="3" height="50%" width="50%">
This is
called relative sizing because I’m not specifying absolute pixel dimensions
but, instead, sizes that are relative to the browser window opening, with
relative sizing, the table size varies according to the window size.
<tr>
<td width="200">This cell is 200 pixels wide.</td>
<td width="140">This cell is 140 pixels wide.</td>
<td>This cell's width is set automatically.</td>
</tr>
</table>

Align a
Table, Row, or Cell
To achieve
the placement you want, you can align a whole table, a whole row, or the
contents of individual cells.
You can
align a table horizontally within a web page by adding the align attribute to
the opening <table> tag and specifying left, right, or center, as needed.
For example, to center a table on the web page that contains it.
<table align="center" border="2" cellspacing="5">

Align a row horizontally
You can
align the contents of a row within their cells by adding the align attribute to
the opening <tr> tag and specifying left, right, center, or justify, as
needed. For example, to apply justified alignment (where both the left and
right edges of text are aligned) to a row:
<tr align="justify">
Align a cell’s contents horizontally
You can align a cell’s contents horizontally by adding the align attribute to the opening <td> tag and specifying left, right, center, or justify, as needed.
<td align="center">Telecoms</td>
Cell
Spanning
Tables that
use a regular grid are useful for presenting data in a tabular format, but to
layout a page with tables, you’ll often need to remove some of the borders
between rows and columns. To do so, you make a cell span two or more
rows or columns—in other words, you merge the cells in two or more rows, or in
two or more columns, into a single larger cell.
Make a cell span two columns
To make a
cell span two or more columns, add the colspan attribute to the opening
<td> tag of the cell in the leftmost of the columns involved, and specify
the number of columns to span. For example, to make a cell span three columns:
<table border="1" cellspacing="2" cellpadding="4">
<tr>
<td colspan="3">This cell spans all three columns.</td>
</tr>
<tr>
<td>Column 1</td>
<td>Column 2</td>
<td>Column 3</td>
</tr>
</table>

Make a cell span two rows
To make a cell span two or more rows, add the rowspan attribute to the opening <td> tag of the cell in the topmost of the rows involved, and specify the number of rows to span. For example, to make a cell span two rows:
<table border="1">
    <tr>
      <td colspan="2">This cell spans the two columns</td>
      <td rowspan="2">This cell spans two rows</td>
    </tr>
    <tr>
      <td>column 1</td>
      <td>column 2</td>
    </tr>
</table>

Semantic Table (Header, Body, and Footer)
Tables
can be divided into three portions − a header, a body, and a foot. The head and
foot are rather similar to headers and footers in a word-processed document
that remains the same for every page, while the body is the main content holder
of the table.
The three elements for separating the head, body, and foot of a
table are −
- <thead> − to create a
separate table header.
- <tbody> − to indicate the
main body of the table.
- <tfoot> − to create a
separate table footer.
A table may contain several <tbody> elements to
indicate different pages or groups of data. But it is notable
that <thead> and <tfoot> tags should appear before <tbody>
Example
<table border="1" width="100%">
<thead>
<tr>
<td colspan="4">This is the head of the table</td>
</tr>
</thead>
<tfoot>
<tr>
<td colspan="4">This is the foot of the table</td>
</tr>
</tfoot>
<tbody>
<tr>
<td>Cell 1</td>
<td>Cell 2</td>
<td>Cell 3</td>
<td>Cell 4</td>
</tr>
</tbody>
</table>

Create a Nested Table
Spanning columns, spanning rows, or spanning both columns and rows gives you decent flexibility in laying out your tables; however, if you must create a truly intricate table design, you may need to nest one table within another.
To nest a table, enter the complete structure of the nested table within the <td> and </td> tags for the cell in which you want the nested table to appear. The next example creates the simple nested table shown here.
<tr>
<td>Column 1</td>
<td>Column 2</td>
<td>Column 3</td>
</tr>
<tr>
<td>Column 1</td>
<td>
<table border="1">
<tr>
<td>Table</td>
<td>nested</td>
</tr>
<tr>
<td>in a</td>
<td>cell</td>
</tr>
</table>
Nested Tables
</td>
<td>Column 3</td>
</tr>
</table>

Adding a Background Colour To a Table in HTML
A color can be added as a background in HTML table using the “background-color” option.

<!DOCTYPE html>
<html>
<head>
<style>
table,th,td {
border: 1px solid black;
border-collapse: collapse;
}
th,td {
padding: 5px;
text-align: left;
}
table#t01 {
width: 100%;
background-color: #f2f2d1;
}
</style>
</head>
<body>
<table style="width: 100%;">
<tr>
<th>Firstname</th>
<th>Lastname</th>
<th>Age</th>
</tr>
<tr>
<td>Priya</td>
<td>Sharma</td>
<td>24</td>
</tr>
<tr>
<td>Arun</td>
<td>Singh</td>
<td>32</td>
</tr>
<tr>
<td>Sam</td>
<td>Watson</td>
<td>41</td>
</tr>
</table>
<br />
<br />
<table id="t01">
<tr>
<th>Firstname</th>
<th>Lastname</th>
<th>Age</th>
</tr>
<tr>
<td>Priya</td>
<td>Sharma</td>
<td>24</td>
</tr>
<tr>
<td>Arun</td>
<td>Singh</td>
<td>32</td>
</tr>
<tr>
<td>Sam</td>
<td>Watson</td>
<td>41</td>
</tr>
</table>
</body>
</html>

Styling HTML
Table even and odd cells
<!DOCTYPE>
<html>
<head>
<style>
table, th, td {
border: 1px solid black;
border-collapse: collapse;
}
th, td {
padding: 10px;
}
table#alter tr:nth-child(even) {
background-color: #eee;
}
table#alter tr:nth-child(odd) {
background-color: #fff;
}
table#alter th {
color: white;
background-color: gray;
}
</style>
</head>
<body>
<table id="alter">
<tr><th>First_Name</th><th>Last_Name</th><th>Marks</th></tr>
<tr><td>Sonoo</td><td>Jaiswal</td><td>60</td></tr>
<tr><td>James</td><td>William</td><td>80</td></tr>
<tr><td>Swati</td><td>Sironi</td><td>82</td></tr>
<tr><td>Chetna</td><td>Singh</td><td>72</td></tr>
</table>
</body>
</html>

Table <colgroup> Tag
This tag is used to specify the
group of one or more columns in a table for formatting. It is useful for
applying styles to entire columns, instead of repeating the styles for each
column, and for each row.
The <colgroup> tag must be used as
a child of a <table> element, after any <caption> elements and before any <thead>, <tbody>, <tfoot>, and <tr> elements.
Syntax
The <colgroup> tag is written as <colgroup></colgroup>. It can have either a span attribute, which
specifies how many columns to span, or it can contain one or more <col> tags, which can be
used to represent different columns within the <colgroup> element.
Like this:
<table>
<colgroup span="" class=""></colgroup>
<tr>
<td>Cell</td>
<td>Cell</td>
<td>Cell</td>
</tr>
</table>
Or this:
<table>
<colgroup>
<col class=""></col>
<col class=""></col>
<col class=""></col>
</colgroup>
<tr>
<td>Cell</td>
<td>Cell</td>
<td>Cell</td>
</tr>
</table>
Example:
See the Pen table <colgroup> Tag by PANKAJ (@pankkap) on CodePen.
Video Tutorial: https://youtu.be/mCwZJTF3um4